


My mother's parents, who immigrated from Poland after WWII often gave us wycinanki cards and had many decorative pieces in their home. I also saw them being made when I visited Gdansk while on a trip two-week trip to Poland after I graduated high school. Hence, the fascination for wycinanki and love for Polish folk art is well ingrained in me, and so it is only appropriate that I honor my heritage in my quest for arts-and-craftiness!
What you need:

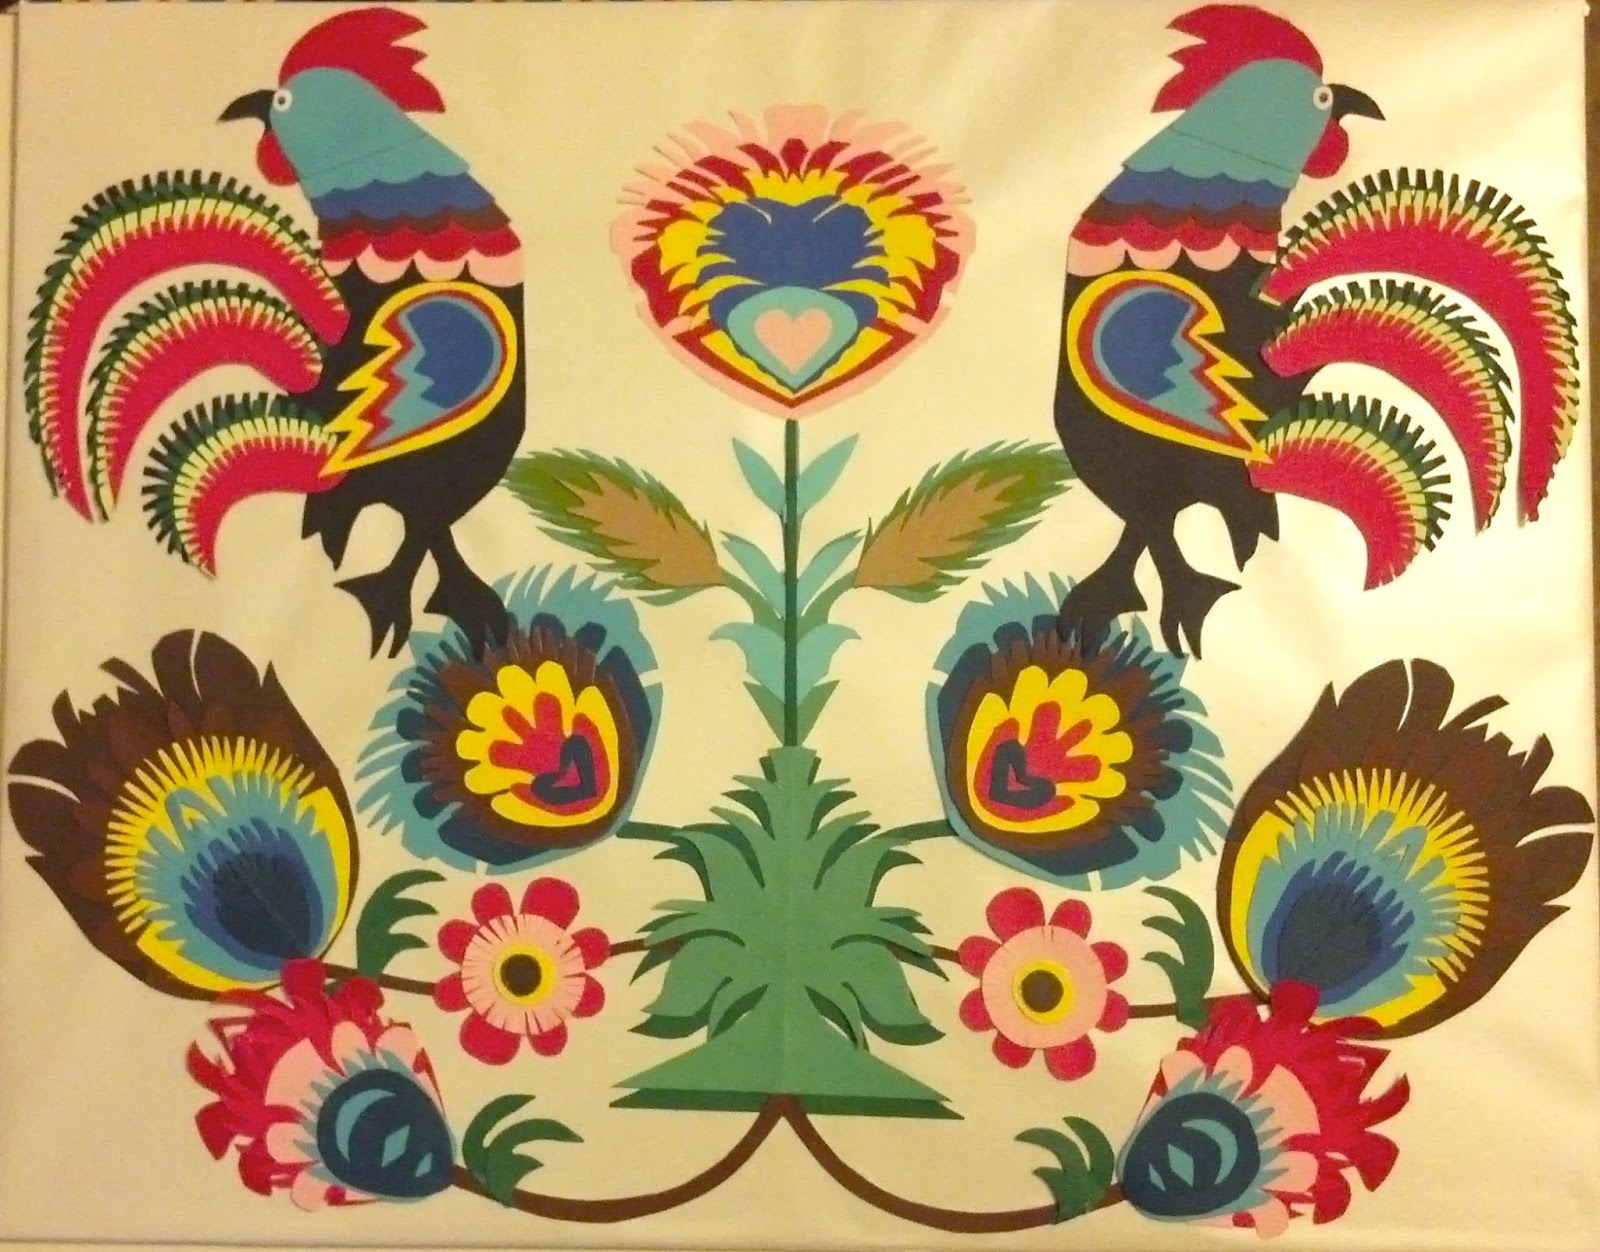
- Colored paper - I chose 8 colors for the flowers/rooster and 3 shades of green for the leaves that I repeated in different variations to give the piece a unifying spectrum of colors
- Scissors
- Craft or paper glue
- Template for the flowers, birds, etc. I drew mine by hand, but you can find them on the internet as well.
- A picture frame or other piece to hang your design on, or you can make it into a card!
- Inspiration and a lot of patience!


Then I set out on making the flower. I used the original flower from the design I made as the larger bottom layer. I traced the outline of that flower, then drew by hand a smaller oval within that shape for the next layer, and repeated the same process for each layer of petals. Also, I made the petals of each layer a little bit different from the one before it.
And this is centerpiece of my design!
Next I set out on creating 3 flowers for each side of the design. I followed the same process as described for the first flower. First, I drew the larger bottom layer by hand on a folded piece of colored paper, so that when I cut it out there would be two identical flowers.


Then I took that cut out design, traced the outline, and drew the next flower to be a little smaller and also changed the petals. I also drew this on a piece of folded paper, which I cut out to have two identical flowers.


I repeated this process for a total of 5-6 layers for each of the three flowers that I made.


After I finished the flowers, I set out on making my roosters. I began by drawing a template of a rooster along the folded line of a black piece of paper.After cutting out the rooster shape, I began adding the feathers, beginning with the tail, then the head, and finally the wings. I ended up cutting the roosters into two separate pieces.


Thank you so much for visiting my blog! Please leave comments, questions, and suggestions for future posts :)
Przjemnego dnia! Have a great day!
I have no idea when you found the time to creative this beautiful artwork,but BRAVO! Aunt Flo
ReplyDeleteThank you so much, Aunt Flo! I am on break from school, so I have been filling my days with arts and crafts :)
DeleteThat turned out amazing! Can't believe it was your first try!
ReplyDelete