Thursday, November 26, 2015

KT Baked It: Thanksgiving Pumpkin Cheesecake

Happy Thanksgiving 2015! 

This year, we are staying home and cooking this annual meal for our family of three. We are sad that we will not be able to see our families, but I am excited to make my mom's most beloved Thanksgiving dishes this year. These include baked cream cheese mashed potatoes, broccoli and carrot casserole with horseradish dressing, sausage stuffing, cranberry jello salad, and last but certainly not least her favorite pumpkin cheesecake!

Today I am excited to share her cheesecake recipe with all of you!

What you need:
For the crust
3/4 cup crushed pecan Sandies
4 Tbl melted butter
2 Tbl brown sugar

For the filling
3 8oz cream cheese, softened
1 cup sugar
3 eggs + 1yolk
1 cup pumpkin
2 tsp pumpkin pie spice
1 Tbl corn starch
1 tsp vanilla
pinch salt
2 Tbl cream or milk

First, preheat the oven to 350 degrees.

For the crust, use a food processor to break apart the pecan Sandies into fine crumbs. Then combine the crumbs with the butter and brown sugar. NOTE: I ended up using an entire package of Sandies crumbs because the mixture was too oily.


Press the crumb mixture onto the bottom and up the sides of a 9" springfoam pan.


For the filling, combine the eggs, sugar and cream cheese with an electric mixer. 
Next, add the pumpkin. Another deviation from the original recipe - I used an entire 15oz can of pumpkin by mistake! However, it still turned out perfect (thankfully). Next, add the pumpkin pie spices or create your own blend of spices to taste (I used nutmeg, cinnamon, ground cloves and ginger).

Finally, add the cornstarch, vanilla, pinch of salt and milk or cream. I substituted 2 tablespoons of tapioca flour in place of the cornstarch and used almond milk. 

Then pour the filling into the crust.

Put the cheesecake into the oven and bake for 55 minutes. Allow the cheesecake to cool in the oven with the door ajar. 
And you have a delicious pumpkin cheesecake perfect for the holiday season!

Friday, November 13, 2015

KT Made It: Diaper Wreath

Last weekend I was lucky to celebrate with my husband's family at my sister-in-law's baby shower as she looks forward to welcoming the long awaited arrival of a baby boy to the Baker family. I wanted to make her something special for her baby shower, and the invite to a diaper raffle afforded a great opportunity to make her something! I've seen many different diaper crafts including wreathes, bouquets, and cakes on Pinterest. I decided to make a wreath for this celebration!

There are several ways to make a diaper wreath. For this one, I chose to use a wire floral wreath. I used a package of size 2 Pampers Swaddlers, although any size will do. You also need rubber bands and ribbon. 

To make, open the diaper and insert the wreath in between the two sides of the diaper, with the open end facing outside. Secure with a rubber band as you see here. 


Add diapers around the circumference of the wreath, as many as you can fit. 
Next, tie ribbon around each rubber band.
Ta-da!
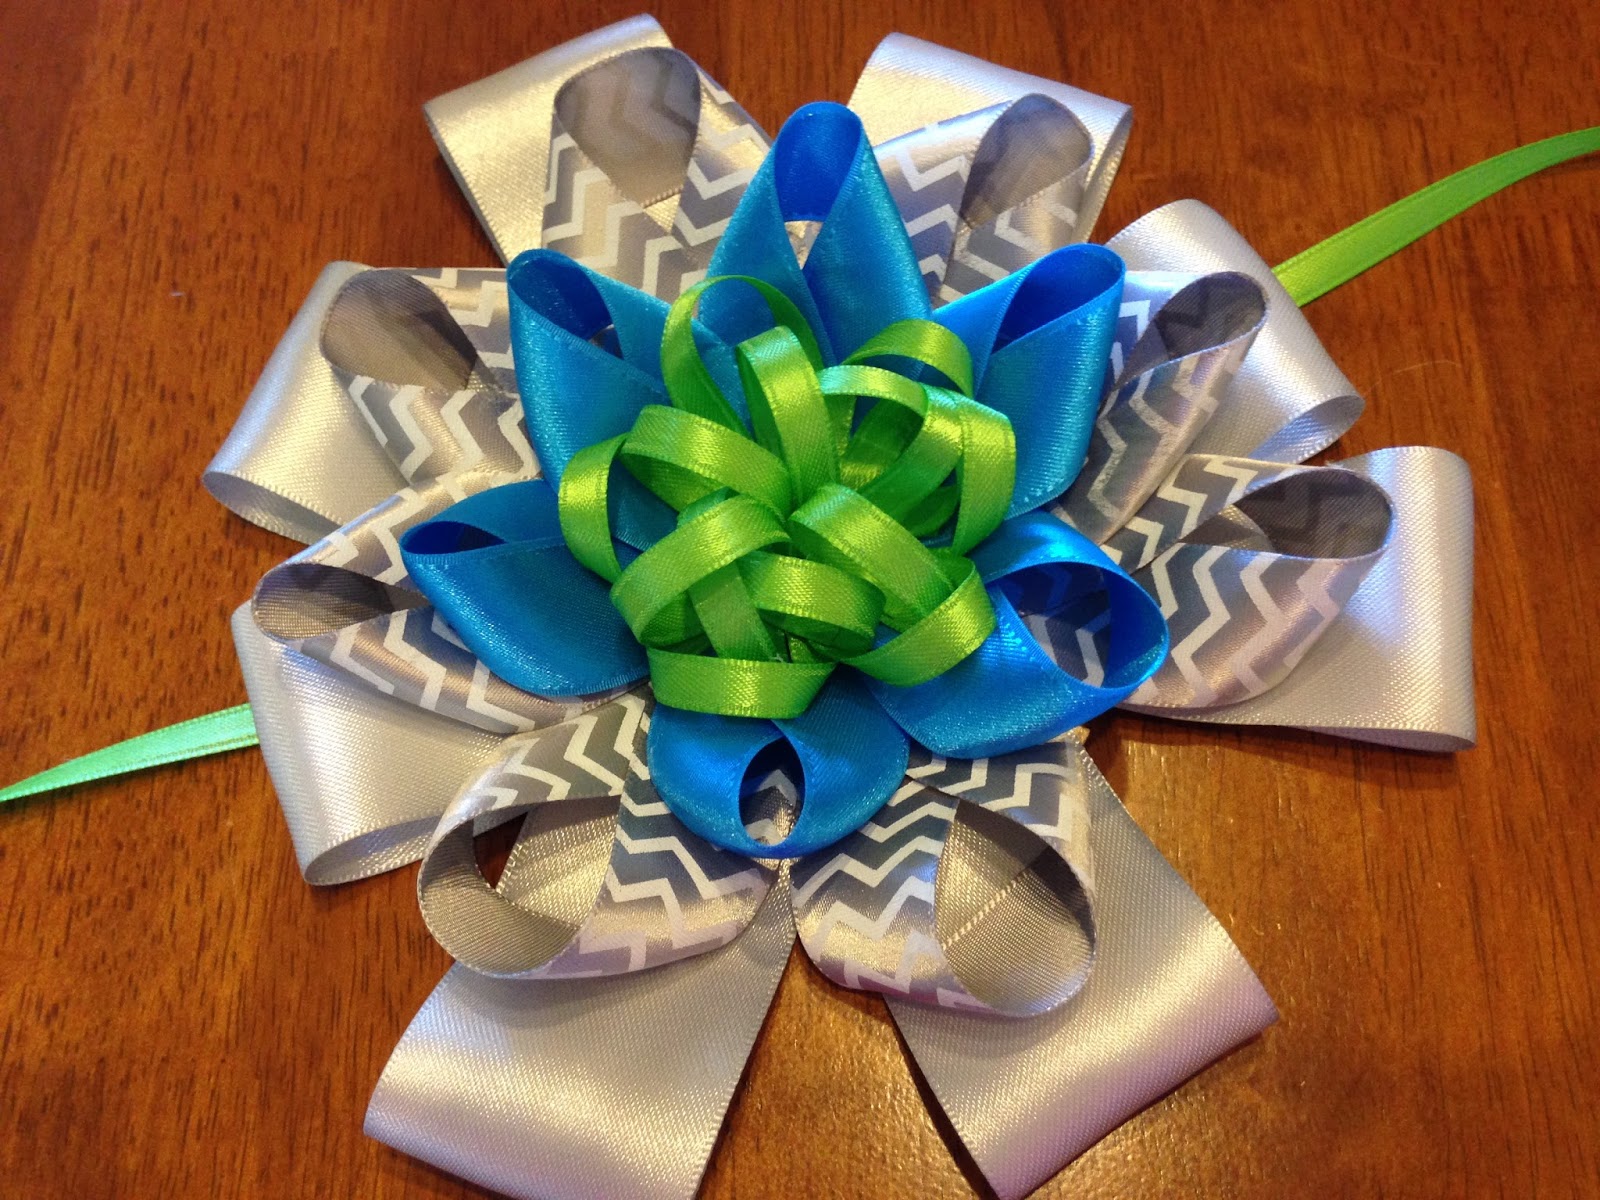
Clearly this needed a little more decoration! So I decided to make a large bow to go on the wreath. To make the bow, I started with a circle of stiff felt for the base and four different sizes and colors of ribbon 
I cut two slits in the center of the circle, and slid a long piece of ribbon through the center which would be used to attach the ribbon to the wreath. Next, I used the ribbon of the largest width and folded the ribbon lengthwise to make loops, attaching them around the circumference of the circle with my hot glue gun. 
Using the next ribbon, I created loops by folding the ribbon so that the outside ends were touching as you see below. 

Then I glued each loop around the circle...
Then I did the same thing with the next color...
And the same thing with the last color...

Finally, I used the green ribbon and made small circles and glued them close together in the center. 
Voila! And here is the finished wreath. Hope that I get to make another one of these soon!
And of course matching closet dividers like the ones that I made for my little Princess!


Sunday, November 1, 2015

KT Made It: Sweet and Sour Meatballs


Happy November! So very excited for the upcoming holidays, and no better way to get things rolling than with some comfort food. This is a much loved dish that my mom would make throughout my childhood. I have not had these meatballs in years, and I have never made them myself so preparing and eating these today was quite a treat!

What you need:

For the meatballs...
1 lb ground beef or ground turkey
1/4 cup bread crumbs (I made my own by toasting a slice of bread and then pulsing in the food processor)
1/2 tsp salt
1/2 tsp pepper
1 Tbl olive oil
1 egg
1 tsp minced garlic

For the sauce...
1 cup ketchup
3/4 cup brown sugar
2 Tbl soy sauce
2 Tbl white vinegar
1 green bell pepper, chopped
1 can pineapple chunks


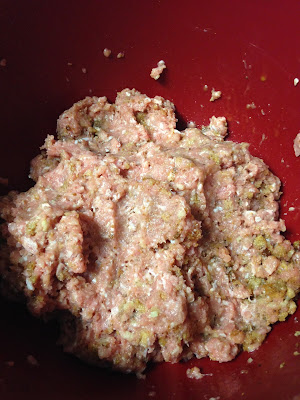
First, combine bread crumb, salt and pepper, egg, oil and minced garlic with ground turkey or beef. 

Take a heaping tablespoon of the meat mixture to make your meatballs. Makes about 25.

Cook meatballs in a preheated over at 400 degrees for 15 minutes. 

Now it's time for the sauce! Chop your peppers (and onions if your like), and saute them in olive oil in a large sauce pan until tender. 
Add the remaining ingredients to the sauce pan...


Finally, add the meatballs and let the sauce simmer for about 20 minutes before serving over a bed of rice. Bon appetite! 

Saturday, October 24, 2015

KT Cooked It: Chicken Tortilla Soup

Since starting my new full-time job three weeks ago, I have been faced with a dilemma that many a working parent encounters: limited time to make dinner. So, after a pizza (or two) and rotisserie chickens from the grocery store, I pulled out the crock pot and decided to make some soup that would last us a few days for lunches and dinners.

Last week I made a delicious chicken tortilla soup, which is a variation of this recipe from Betty Crocker. Hubby really enjoyed it too, which means it will go in the cookbook for future reference!

What you need:

1lb chicken breast
1 1/2 cup low sodium chicken broth
15 oz can of roasted diced tomatoes, undrained
15 oz can of whole kernel corn, red and green peppers, undrained
10 oz can mild enchilada sauce
1/2 large onion, chopped
15 oz can black beans, drained
1 tsp ground cumin
1 tsp chili powder


Place all of the ingredients into your crock pot. Cover and cook on low heat for 4 hours or until the chicken is very tender.


Remove the chicken breast. Using two forks, shred the chicken and place back into the slow cooker. Cook for 30 minutes longer. Garnish your soup with cheese, sour cream and pieces of tortilla chips.

It's THAT easy!


Sunday, October 18, 2015

KT Baked It: Pumpkin Cheesecake Snickerdoodles

It's officially fall - the leaves are changing color, sweaters and puffy vests have been pulled out of storage, and everything now comes in a pumpkin spice flavor. With holiday baking season upon us, I decided this weekend was as good of a time as ever to kick off the baking fun. This recipe was given to me by my mother-in-law, Sandi. It comes from the Bakeaholic Mama...and it is SO yummy! 

What you need:
For the cookies...
3 3/4 cup all-purpose flour
1 1/2 tsp baking soda
1/2 tsp salt
1/2 tsp cinnamon 
1/4 tsp nutmeg
1 cup unsalted butter, at room temperature
1/2 cup light brown sugar
3/4 cup pumpkin puree
1 large egg
2 tsp vanilla extract

For the filling...
8 ounces cream cheese, softened
1/4 cup sugar
2 tsp vanilla extract

For the coating...
1/3 cup sugar
1 tsp cinnamon
1/2 tsp ginger
1/4 tsp nutmeg

Start by mixing the dry ingredients for the cookies in a mixing bowl - flour, baking powder, salt, cinnamon, and nutmeg. 


Next, cream the butter and sugars using a handheld mixer or Kitchenaid mixer. 

Add the pumpkin puree, egg and vanilla extract to the creamed butter and sugars.


Slowly add the dry ingredients to the pumpkin mixture to finish the cookie dough. Refrigerate the dough for at least an hour. I left mine refrigerate overnight...
Next, make the cream cheese filling by combining the cream cheese, sugar and vanilla with a handheld mixer. Also allow this to refrigerate at least an hour. 

When you are ready to make your cookies, mix the cinnamon-sugar coating together by combining the sugar and spices. 

Preheat the oven to 350 degrees. Line your cookie sheets with parchment paper. 

To make the cookies, take a tablespoon of dough, roll into a ball and then flatten into a pancake.

  
Take 1 teaspoon of filling and place it in the middle of the flattened cookie dough.
Take a second tablespoon scoop of dough as before - roll into a ball and flatten - then place on top of the filling. Pinch the sides together and then roll the dough ball in the cinnamon sugar.
Place the cookies about 2" apart on your cookie sheet, then flatten the cookie dough balls with the bottom of a glass. 
Bake for 15 minutes or until the top of the cookie cracks.

I will absolutely make these again, they are delicious!

Monday, September 28, 2015

KT Made It: Baby Closet Dividers

It's hard to think of an introduction for this blog post when I have been absent for so long from sharing all the did-it's I have been doing. Perhaps it's best to state the truth: the did-it's that I have been doing are mommy duties to our beautiful (and very active) almost-4-month-old baby girl! I have even considered evolving my blog to reflect my adventures (misadventures?) in parenting an infant, as it would certainly make for comical reflection and perhaps might even be informative or maybe even comforting for other new mommies who, like me, are trying to figure out this thing called parenthood! 

While there may certainly come a time when parenting stories and struggles could become the norm, today I am excited to share a project that I have been slowly working on for Rachel's nursery: closet dividers! In the many hours I spent on Pinterest while holding her at night as a newborn when she would not sleep anywhere but in our arms, I came across many cute ideas for these dividers to organize the sizes of baby's clothes. 

I made my dividers using 89cent wooden door hangers from Michaels craft store, acrylic paint and ribbon. 

I made four different dividers: 3months, 6months, 9months, and 12months. I made a different pattern for each divider using two or three of the colors of the nursery (purple, turquoise, gray, white). Here are some pictures of my work, which I accomplished little by little over the last week while Rachel sat contently for various lengths of time (usually very short moments in fact) in her Bumpo seat or vibrating chair next to me listening to me sing her Disney songs or tunes from Toddler Radio on Pandora. 

 And here are the finished dividers! 

Quite an accomplishment, and pretty cute if I do say so myself!

Farewell friends, until we craft again 😊